Hey future dental technicians! Ever wondered how that comfortable, flexible partial denture takes shape in the lab? Today, we’re diving into a crucial step in its creation: flasking. This process, while seemingly simple, is fundamental to achieving a precise and well-fitting flexible appliance. Let’s break down the dental technician’s operational sequence for flasking a flexible partial denture.
What’s Flasking All About?
Flasking is the process of embedding your carefully articulated and waxed-up flexible partial denture framework and teeth within a dental flask using plaster or stone. This creates a mold that will withstand the heat and pressure of the subsequent processing steps, like wax elimination and the injection of the flexible resin.
Your Flasking Toolkit:
Before we begin, gather your essentials:
- Dental Flask (typically a two or three-part flask)
- Dental Plaster or Stone (Type III or IV)
- Mixing Bowl and Spatula
- Vibrator
- Separating Medium (e.g., alginate separator)
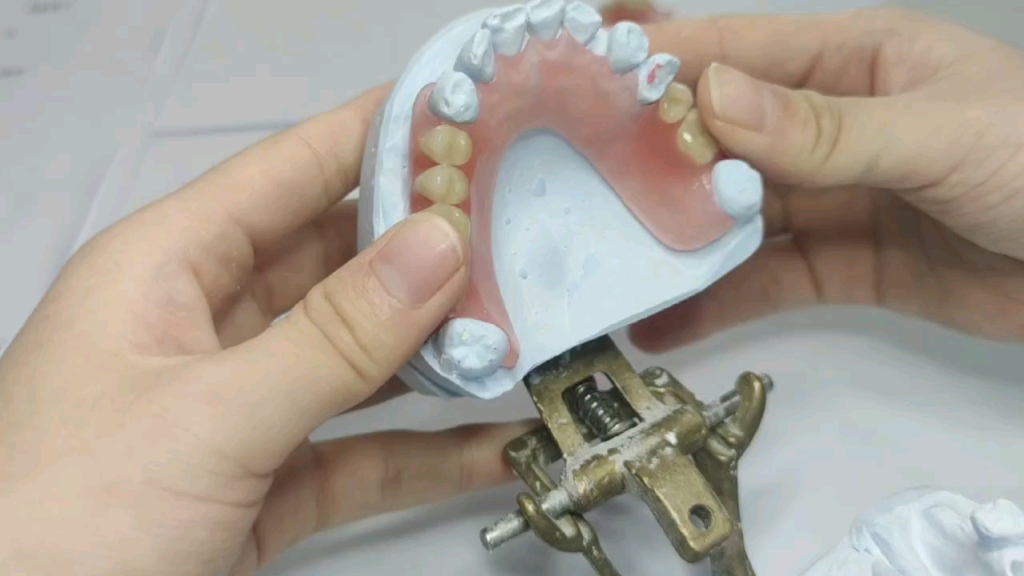
- Waxed-up partial denture framework on the master cast
The Step-by-Step Flasking Sequence:
- First Pour (Investing the Cast):
- Mix your plaster or stone to the appropriate consistency.
- Place a small amount of plaster in the base of the flask.
- Gently seat your master cast with the waxed-up partial denture into the plaster, ensuring the wax-up is fully exposed and not touching the flask walls.
- Use a vibrator to eliminate air bubbles and ensure the plaster flows evenly around the cast.
- Allow the plaster to set completely.
- Applying Separating Medium:
- Once the first pour is set, apply a thin, even layer of separating medium to the plaster surface, including the exposed wax-up and teeth. This will prevent the subsequent plaster layers from sticking.
- Second Pour (Investing the Wax-up):
- Place the counter flask ring onto the base.
- Mix another batch of plaster or stone.
- Carefully pour the plaster into the counter flask, completely covering the waxed-up partial denture.
- Again, use the vibrator to ensure proper flow and eliminate air pockets.
- Allow this layer to set completely.
- Optional Third Pour (Coping):
- For three-part flasks, apply separating medium to the second pour.
- Place the coping ring onto the counter flask.
- Mix the final batch of plaster or stone and pour it into the coping ring.
- Vibrate and allow to set.
- Flask Separation:
- Once all plaster sections are fully set, carefully separate the flask halves. This might require gentle tapping with a plaster knife or mallet.
Key Considerations for Success:
- Cleanliness is crucial: Ensure your flask and instruments are clean to prevent contamination.
- Proper plaster consistency: The plaster should be flowable enough to capture all details but not too watery.
- Avoid trapping air: Use the vibrator effectively during each pour.
- Complete setting: Allow each plaster layer to fully set before proceeding to the next step.
- Gentle separation: Avoid damaging the plaster mold or the wax-up during flask separation.
Why Master Flasking?
A well-flasked case is the foundation for a successful flexible partial denture. It ensures the accurate reproduction of your wax-up in the final resin appliance. By following these steps meticulously, you’ll be well on your way to crafting comfortable and functional flexible partial dentures for your patients. Keep practicing, and you’ll master the art of flasking in no time!
Looking for Dental Flask? Our Dental Laboratorio provides extensive dental flask options, from brass upper/lower with press to plastic duplicating boxes.